The Rubik’s Cube is the world’s best-selling toy, and you’ve probably discovered it by now. You might pick it up and try playing with it, flipping the sides, hoping to put at least some of the pieces together. But solving a Rubik’s Cube alone without help is a challenging task. The creator himself, Erno Rubik, took two months!
This blog is meant to guide you to solve the Rubik’s Cube and your journey to solving the cube.
The Basics
1. Colours
The cube has 6 sides, each representing a color – white, yellow, blue, green, orange, and red.
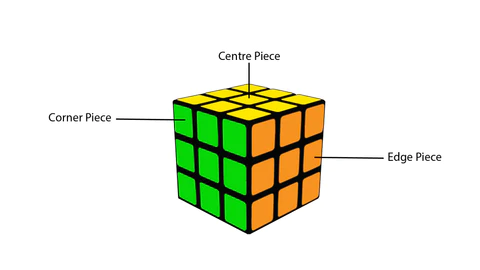
2. Pieces
There are three types of cuts –
Center – they are fixed and serve as guides for solving puzzles. In a solved cube, all the pieces of a particular color surround the center of that color. In a rolled die, the center represents the side where the details of a specific color should be.
Corners – As the name suggests, corner pieces are located at the cube’s corners. Each section consists of three different colors. Each cube shape has 8 corners, and thus there are 8 corners of the Rubik’s Cube.
Edge – An edge is a part between two corners. They consist of two colors. The Rubik’s Cube has 12 edges.
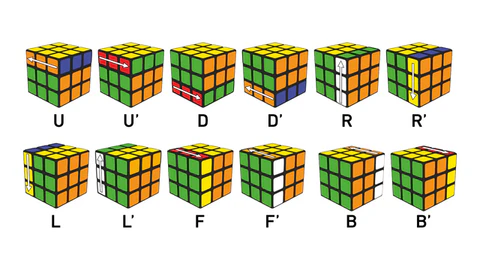
3. Notation
The [] notate the movement of the layer from the natural holding position for a better understanding
- R – Right side clockwise [Right side upwards]
- R’ – Right side anticlockwise [Right side downwards]
- L – Left side clockwise [Left side downwards]
- L’ – Left side anticlockwise [Left side upwards] (Note: L and R may be confusing at first since the moves are opposite to each other)
- F – Front side clockwise
- F’ – Front side anticlockwise
- U – Upper face clockwise
- U’ – Upper face anticlockwise
How is the Cube Solved?
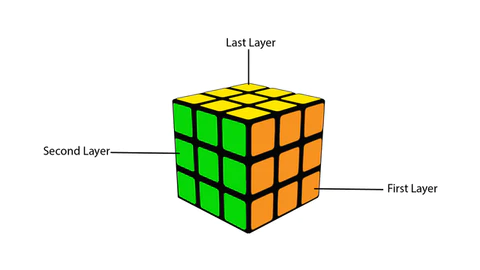
A common misconception is that the dice are broken color by color. This is not possible due to the cut’s nature and the cube’s design. Instead, we approached the cube layer by layer. The bottom layer is completed. First, the middle layer follows, and the last layer towards the end, building the layer on top of the previous one.
The method discussed in this blog is known as the starter method. In the upstart method, the solution is divided into 6 steps –
1. First layer
- White cross
- White corners
2. Second layer
- Non-yellow edges
3. Last Layer
- Yellow cross
- Yellow corners and edges
- Completing the top layer
Step 1:- First layer
White Cross
Crosses usually start out white and this tutorial also uses white as the initial layer. The steps to complete the cross are listed below.
- Find each white edge of your cube and identify the non-white edges (edges are two colors, so white edges have white parts and non-white parts are different colors).
- Connect the non-white parts to their center with a dash and sample – this should be easy to do in 2-3 moves.
- Once the shape is aligned with the center, rotate the shape so that the white portion is aligned with the white center.
You have successfully cracked a piece! Repeat this process for the other white edge until you get a white cross.
White Corners
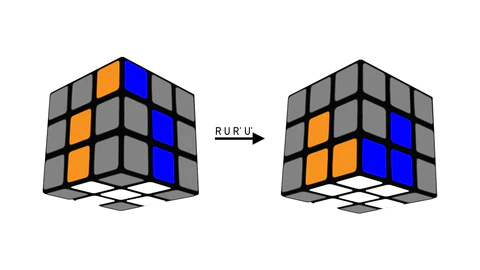
White angles are the easiest to learn. Before continuing, try this move sequence on your cube – R U R’ U’. You’ve just learned your first algorithm! The algorithm consists of a series of moves that help us move the cube’s pieces without disturbing the other pieces’ final position.
- Start by positioning the cube so that the white center is facing down.
- Find the white corner on the top level. Identify the non-white parts of the white corners.
- Move the top layer until the white corner lands between the corresponding middle of the non-white parts (see image).
- Run the algorithm – R U R’ U’ until the white corners are resolved correctly.
- Repeat for all white corners.
Step 2:- Second layer
1. Non-yellow edges
ALGORITHMS USED
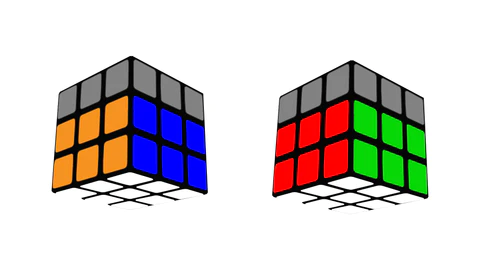
- U R U’ R’ U’ F’ U F. [center on the right]
- U’ L’ U L U F U’ F. ‘ [center on the left]
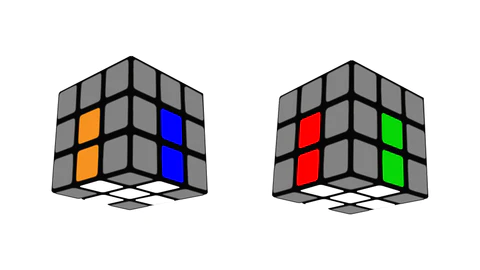
The second layer works on the positioning of non-yellow edges:
- Find the edge that isn’t yellow.
- Identify the edge in front of you and match it to the center of the same color by rotating the top layer.
- Identify the edges connecting to the yellow center and find the corresponding center.
- Use the first algorithm if the center is on the right side of the cube’s current position. Otherwise, use the second algorithm.
Step 3: Last Layer
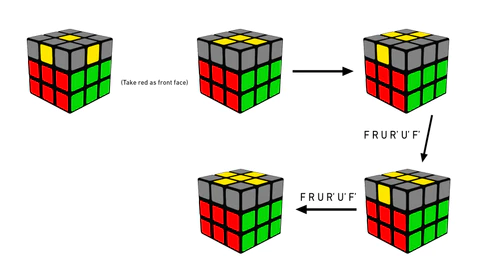
1. Yellow cross – F R U R’ U’ F’
The yellow cross can be divided into three cases. The algorithm used for each patient is the same, but the starting positions are different. Identify the squares on your cube and position them according to their corresponding parts on the image. Just repeat the algorithm until the cross is solved.
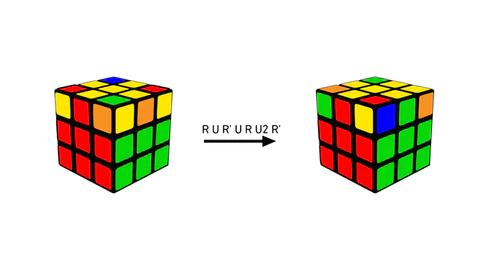
2. Positioning last layer edges – R U R’ U R U2 R.’
Now let’s match the edges to the center of the last layer. Match each top layer edge with its center on the middle layer. Now repeat the algorithm until all the edges match the midpoint.
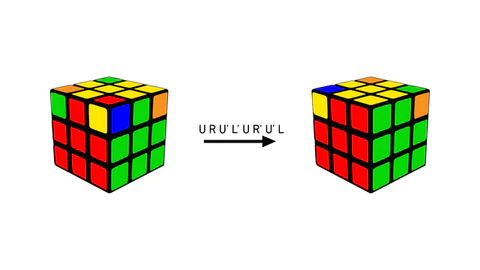
3. Last layer corners – U R U’ L’ U R’ U’ L
Now to match all the corner pieces on the top layer, find the matched corners and hold them on the front right corner of the cube. If none of the corner pieces are in the correct place, you can hold the cube in any orientation with the pieces that don’t match on top and apply the algorithm.
4. Top layer corners – R’ D’ R D
Now keep the yellow pages and the non-aligned corners on the front right corner, use the above algorithm until the corners are aligned, then rotate the top layer and bring the non-aligned corners to the front right corner and flip you then apply the same algorithm again until the corners are resolved. Repeat this process until all corners are resolved.
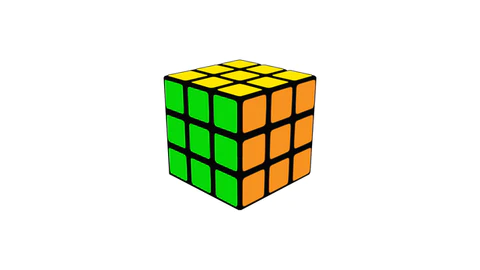
With this final step, the cube is finally solved.
Congratulations on completing the Cube! Even if the first solutions are confusing, remember that you get better with each completion. It usually takes 5-10 solutions to get used to a new method, so keep practicing.
Once you get used to solving cubes, you can also start timing. This marks the beginning of your journey into the world of speedcubing. Learn more about how to start your cube journey, what you need to get started, and how to upgrade!